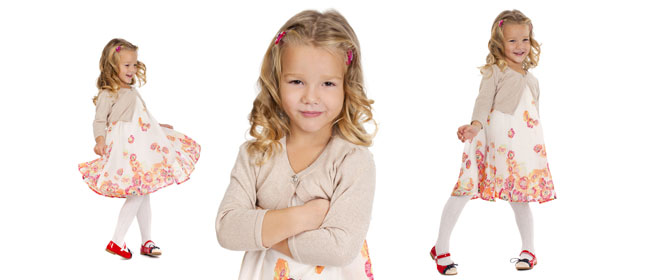
Once you’ve made the pattern, you can whip out a dress for your little one (or yourself) in under an hour. Follow these easy steps.
This adorable pattern and instructions come from a 1931 newspaper that is now in the public domain. Use it to make a dress to the exact measurements of your child. You could also use it for yourself.
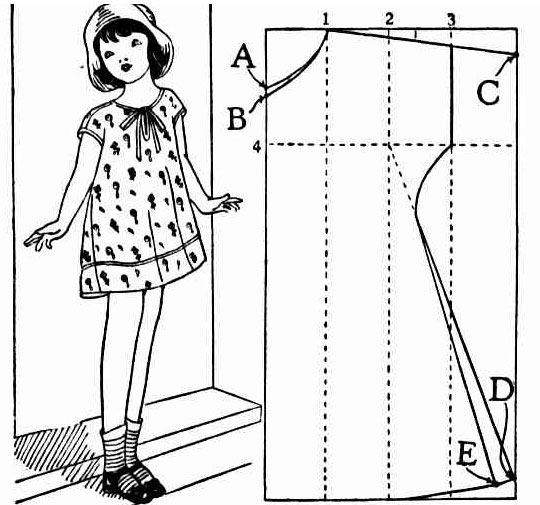
When the fabric of a little girl’s frock is charmingly quaint or amusingly gay, the style of the dress itself may be of the simplest sort. In a single day you can make eight or ten little dresses like the one sketched here.
The amount of material needed for each frock will be twice the length the dress is to be from the top of the shoulder to the bottom, plus twice the hem allowance. Here are all the dimensions needed to make a good kimono sleeve dress pattern to exactly fit the child.
Take a piece of paper as long as the dress, plus the hem allowance, and as wide as one half the all-round chest measure. Divide the paper lengthwise into fourths, as shown here by the dotted lines numbers one, two, and three.
Measure down from the top of the paper one-fourth the chest measure, and mark line number four across the paper at this point. Point A is halfway between the top of the paper and line four. B is one half inch below A. C is one and one half inches below the upper right-hand corner of the paper.
Determine the slant of the shoulder seam by drawing a line from the top of line one to point C. Outline the back neckline with a curve drawn from A to the top of line one. The front of the neckline is drawn from B to the top of line one.
Point D is one inch up from the lower right corner of the paper. Determine the line of the bottom of the skirt by drawing a curved line from this point to the bottom of line 2. Mark E one inch in from D on this line.
Draw a line from point D to the intersection of lines 2 and 4. This determines the flare of the skirt for the front of the dress. Shape the underarm line with a curve from the D line to the intersection of lines three and four as you see it here. A line from the base of this curve to point E will give the right flare for the back of the skirt.
The bottom of the sleeve follows line three from line four to the shoulder line.
The left edge of this pattern is placed on a fold of the goods in cutting.
 My Favourites


Did the pattern come with construction steps? I love this pattern and style, but I’m a beginner and need a little more guidance on construction and finishing.
Hi Morgan
No, sorry, it didn’t come when any instructions. Just how to make the pattern.
Jane