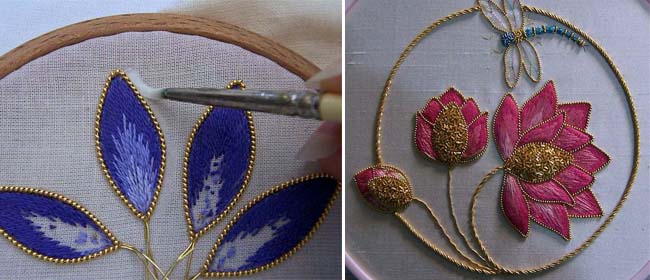
 Sandy Vass from Gold n’ Stitches demonstrates how to add gold edges to embroidered flowers.
This method can be used for attaching various goldwork threads to the edge of detached petals.
Place your selected fabric for the petals in a hoop and tighten until drum tight. Trace the petals onto the fabric.
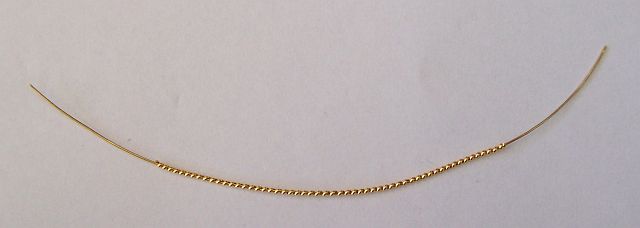
Stretch a piece of No 1 Gilt Pearl Purl to 1 ½ times its original length.
Measure the distance around the petal and cut a piece of the stretched pearl purl the same length. Cut a piece of fine gold coloured jewellery wire (I used 26 gauge wire) 5 cm or 2” longer than the pearl purl. Now thread the jewellery wire through the hollow centre of the purl.
Leave a tail at each end of the purl.
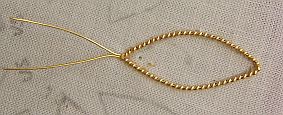
Starting at the base of the petal lay the start of the pearl purl at the base of the petal with the wire tail extending past the base.
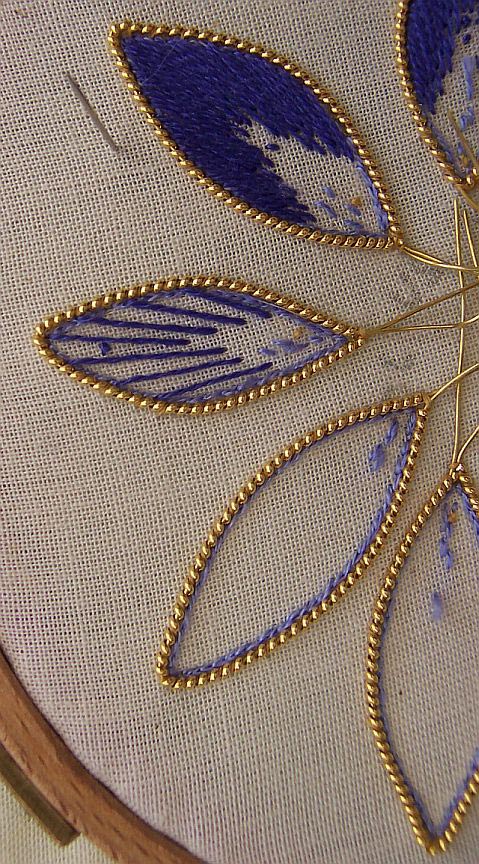
Couch the pearl purl around the outline of the petal, making a stitch over every second or third purl. Remember the petals will be cut out so it is important that all of your stitches are within the outline of the petal!
When you have finished couching the outline and have returned to the base of the petal again, lay the wire tails together and take two stitches over both wires at the same time.
Now fill the petal as desired. When you have finished stitching the petals Do Not remove your work from the hoop.
Before cutting out your petals, the edges are sealed with glue. Yes, GLUE! Choose a PVC glue that will dry clear. Most PVC glues are white in colour but dry clear so it is advisable to read the label to check it will dry clear. I have tried three different ones – PVC wood glue, acid free craft glue and tacky glue. They all work equally well. The acid free glue is preferable if you are intending to create an heirloom piece. If you have trouble getting the acid free glue, try scrapbooking stores as they have a good variety of acid free products.
You will need to make the glue thinner in consistency before applying it. Squeeze some PVC glue into a small glass jar that has a tight seal. Add enough water to reach the consistency of pouring cream (yum, makes me think of strawberries and cream). Seal the jar and shake well. Once this is made up and sealed it will last indefinitely and you will have it on hand when needed. I find it very useful if I happen to accidentally snip a thread when cutting out stumpwork pieces.
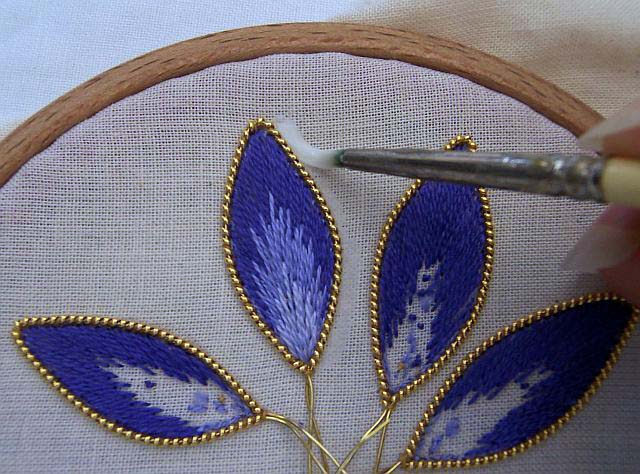
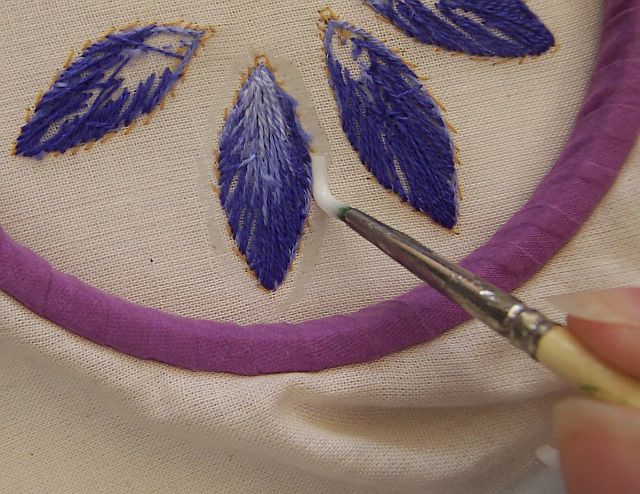
Using a fine paint brush, firstly paint the muslin around the outside edge of the petal, flattening the bristles of the brush so that they get in under the edge of the pearl purl. If you happen to get a little on the pearl purl, don’t be too alarmed as the glue will dry clear.
Now turn the hoop over and apply the thinned glue along the row of couching threads used to couch the pearl purl.
Allow to dry and apply another 3 or 4 coats of glue, allowing each coat to dry before moving onto the next coat.
When the glue is dry, cut out the petals in the same way you would for stumpwork pieces, as shown here.
Enjoy.
See more of Sandy’s amazing tutorials on her website, Gold n’ Stitches.
 My Favourites




Speak Your Mind