Make your own paper, add flower seeds, then cut the paper into cute butterflies. The butterflies can then be ‘planted’ in the garden where the seeds will grow.
This cute little project is super easy (a great one for the kids) and makes for a special gift too. We used recycled paper to create our own handmade paper, then sprinkled seeds onto the paper when it was drying. Then it’s just a matter of cutting the paper into whatever shape you desire – butterflies, flowers or leaves. These make excellent gifts for friends and family. All your friends need do is place them in the garden (soak in water first then plant under a thin layer of soil) and in a matter of weeks they should see little sprouts coming up, and soon after the flowers will grow.
You need:
Old paper, cardboard, egg cartons, envelopes, tissue, etc
Large bowl
Water
Old food processor
Baking tray
Plastic wrap
Paper towels
Sponge
Flower seeds – something appropriate for the season
Twine
Bamboo skewers
To Make:
1. Shred old paper, cardboard, etc, into small pieces and place in a bowl. Cover with water and let soak overnight.
To shorten the time, you can add boiling water and let it soak for 3 hours.
Check the consistency with your hands. Does the paper feel soft and pliable? Then it’s ready to go. The paper should fall apart at the touch.
2. Pour the mixture into a food processor and blend until you achieve a porridge-like consistency.
Line a baking tray with plastic wrap and pour the mixture onto it. How much pulp you use will determine the thickness of your paper. For thin paper, use less pulp.
3. Using your fingers, spread the pulp evenly over the tray.
Sprinkle your flower seeds onto the pulp and gently press.
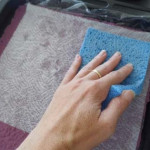
4. Place a paper towel over the top and lightly press with a sponge to soak up excess water.
This will help reduce the drying time. It also presses the paper more firmly together.
5. Let the paper sit in a warm place for a few hours until completely dry.
To help with the last stage of the drying process, you can use a hairdryer on a low setting.
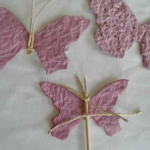
6. To make the butterflies use either a large craft punch or draw them freehand and cut them out. Any leftover scraps can be sown directly into the garden.
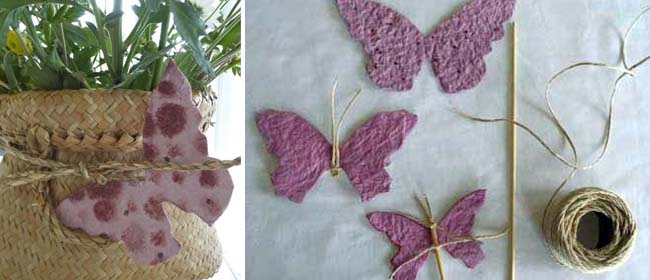
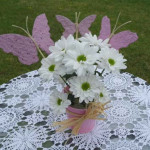
You can use your seeded paper butterflies as gift tags, or tie them onto sticks to place with flowers in a vase or a bouquet.
Cut out a piece of twine to form the body of the butterfly and the feelers and place on one side of the cut-out butterfly.
Cut another piece of twine and gently feed it round the bottom of the twine and tie it on to the skewer.
Tie the top part of the twine to complete the ‘body’ and leave enough twine to represent the feelers.
Tidy up the back by cutting the twine as close as you feel comfortable without the knot coming apart.
Aren’t they pretty?
Have you ever made your own handmade paper? Tell us your experience in the comments below.
 My Favourites





Speak Your Mind