If you have a keen eye for drawing and a steady hand for painting, this decorative coat rack will be a breeze to make. Choose a picture of a coat rack you like and draw its outline onto a wall in your entranceway, or in a bedroom. Add a hat, scarf or bag and you’re done.
You need:
Paint (for background wall colour and coat rack)
25mm paint brush
Small hobby paint brush
Metal coat hook and screws
Pencil
Power drill
Step 1
Paint your wall a dark colour.
The silhouette of the coat rack will stand out more on a dark background, or you could reverse the effect with a white wall and a dark coloured rack.
When dry, draw the outline of a coat rack onto the wall with a pencil.
You can use a broom handle as a guide when drawing the pole of the coat rack, and a bowl or pot when drawing the coat hooks.
Step 2
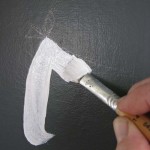
Using a lighter colour, paint your coat rack.
We used an angled paint brush (usually used for cutting in), which gave better control when painting straight lines.
Use a small hobby paint brush for finer details and tricky corners.
Allow to dry then paint a second coat.
Step 3
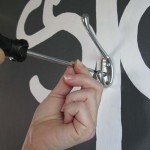
Once dry, hold the metal coat hook in position and draw pencil marks through the screw holes.
Drill pilot holes, then screw hook into place.
We’ve used one hook but you can add as many as you wish.
 My Favourites


Speak Your Mind