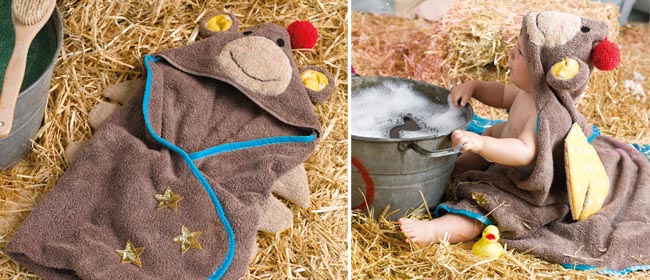
This cuddly bath towel is just right for all the little monkeys out there. Designed by Christine Leech and Hannah Read-Baldrey, this adorable project, with step-by-step instructions, is published in their latest crafty book Everything Oz: The Wizard Book of Makes & Bakes (see bottom of article for book details and giveaway). But there’s good news for Sweet Living readers. We have the full project, complete with photos, templates and step-by-step instructions, right here.
For a newborn baby cut a 50cm square from the towel and adjust the size of all the other pieces accordingly.
YOU WILL NEED:
Brown bath towel
2.7m bias binding or velvet ribbon, about 2cm wide
Beige hand towel
50cm x 50cm yellow cotton fabric
Two 3cm circles black felt for eyes
Matching sewing threads
Brown and pink embroidery thread
50cm x 40cm polyester wadding
Red wool pompom
Appliqué sequin stars
1. Cut a 75cm x 75cm square from the brown bath towel. At three points of the square, round off the corners to a gentle curve.
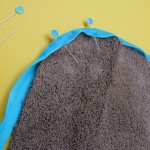
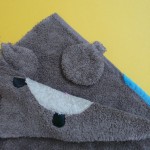
2. Starting and stopping about 20cm along from the square corner, neaten the outside edge with bias binding, stitching it down by hand or machine. Ease the bind around the curved corners, stretching it gently (image 1). If you are using velvet ribbon, fold it in half lengthways first and press.
To make the monkey’s face
3. Cut a 44cm x 30cm x 30cm triangle from the brown hand towel. If possible, use the natural selvedge of the towel as the longest straight side of the triangle. If this isn’t possible, hem the edge to prevent fraying.
4. Using the template (click here to download template), cut one muzzle from the beige flannel. Embroider onto the muzzle a wide mouth in brown thread with chain stitch and two small nostrils in pink thread with straight stitch. With the longest edge of the triangle at the bottom, position the muzzle to create the monkey’s face. Pin and stitch in place. Sew in place the two black felt circles for eyes.
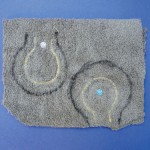
5. Using the template, cut two inner ears from yellow cotton. Place right sides up on a scrap of brown towel 10cm apart. Zigzag stitch around the edges. Using the outer ear template, trace the outlines on to the wrong side of the towel, with a 2cm margin all the way round the stitch lines (image 2).
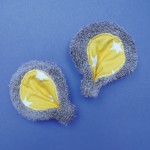
6. Place this scrap of towel together with a second piece, with right sides facing. Stitch around the outlines, leaving a turning hole at the base of each ear. Trim the excess fabric close to the lines of stitching.
Turn right sides out. Pinch the base of the ears together and secure with a few hand stitches (image 3).
7. Lay out the large square of brown towel with the unbound square corner at the top. Position the ears at the top, one on each side about 10cm down from the corner facing into the square. Place the monkey’s face on top, with right sides facing and aligning the raw edges (image 4).
Machine stitch making a curve at the corner. If your machine cannot stitch through all the layers at the ears, leave that section unstitched and then sew it by hand. Zigzag stitch all the raw edges to prevent fraying and trim any excess fabric. Turn right side out. The ears will pop into place.
For the monkey’s wings
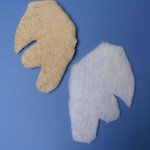
8. Pin together 50cm x 40cm pieces of beige towel and yellow cotton with right sides facing. Using the wing template, trace one outline on to the wrong side of the cotton. Flip the template over and trace a second outline. Stitch, leaving turning holes where marked on the template. Trim the excess fabric close to the lines of stitching. Turn right sides out.
9. Using the same template, cut out two wing-shaped pieces of wadding. Feed the wadding into the sewn wings, trimming if necessary for a good fit (image 5).
10. To quilt the wings, topstitch along the dotted lines marked on the template.
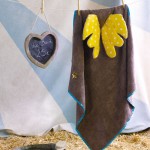
11. Neatly close the opening on each wing with small neat hand stitches. Stitch the wings in place on the back of the towel, 25cm down from the hood.
12. Decorate with a red pompom on the point of the hood and appliqué sequin stars on the front edges.
Extract from Everything Oz
The Wizard Book of Makes & Bakes
by Christine Leech & Hannah Read-Baldrey
Photography by: Verity Welstead
Photography copyright
RRP $34.99 Paperback
© Quadrille Publishing May 2012
Distributed by Bookreps.co.nz
The classic tale of The Wonderful Wizard of Oz by L Frank Baum provides the inspiration for the 50 crafty projects and recipes in this book. Christine Leech and Hannah Read-Baldrey have interpreted this popular tale in their own unique way, providing a creative collection of makes and bakes ranging from a dress-up Dorothy doll and Toto’s dog coat, to the Tin Woodman’s heart garland, Cowardly Lion’s glove puppet and squashed Wicked Witch cupcakes. There’s a lovely patchwork picnic set, quirky party invites and the Great Wizard’s throne tent – plus more.
We have 1 copy of Everything Oz to give away.
To ENTER THE DRAW TO WIN A COPY, simply post a comment below. Anything will do. You can just say hello, if you like. Or tell us your favourite character in The Wonderful Wizard of Oz.
COMPETITION CLOSES ON 5 AUGUST, 2012. Open to New Zealand residents only.
 My Favourites





That towel is simply gorgeous! Thanks for the pattern!
what a classic the wizard of oz is, always brings the songs and smiles to your memory when you think of it. The fun characters and how timeless they are.
Nice tutorial to sew and this book looks very creative, interesting and helpful to an artist, crafter and sewist!
I would love to win this!
Blessings!
Namaste’
From Debra J Webb
The classic ‘Wonderful Wizard of Oz’ is timeless, I woul love to have the chance to craft it up.
Love the Monkey towel, think I might give that a go this weekend 🙂
The bathtowel is fantastic! Very clever design – and great instructions for making it. Thank you!
As usual each Sweet Living issue comes with ideas and step by step projects that make me say”Yes I can do that”Its empowering to be able to re use and recycle stuff and your articles are lovely,useful and make me feel good about what I am doing to.This week I will try the citrus cleaner as I hate to see anything wasted if it can be re used,Thanks
Thanks for the fantastic idea. Guess what I’m going to be giving for baby showers.
What a great idea! I’m going to give this a go!
This is so very cute. Love it!
Gorgeous idea!
Love it! Such an original and cute idea. Will definitely give it a try. Thank you Sweet Living Magazine for bringing us all these fantastic ideas 🙂
I love hoody towels and this is cute!!
Tap your heels together 3 times and say “There’s no place like home” ……..Favorite character: Dorothy of course – who doesn’t love red sparkly shoes! 🙂
Fantastic tutorial and a big fan of Sweet Living – love the DIY and craft section!
Very cute towel.
OMG!! I found this website through craftgawker and I have spent over an hour looking around! Thanks so much for sharing this tutorial, I was looking for a present for my baby niece’s birthday, and this is it!!
Thanks Pao!
I just saw the new “OZ” movie last night. It was great.
Oh, must see that!