The lovely Christine Green of Crafting at the Cottage has written a tutorial on how to make the cutest patchwork ball. These patchwork creations have many uses: insert a small bell and create a ball-shaped rattle for bubs; use festive fabric to create homemade Christmas decorations; or add a bit of catnip in with the filling and watch your cats have fun.
Patchwork Ball
Hand-crafted patchwork is so on trend at the moment. If you’ve never tried it before, this is the perfect project for you. Therapeutic and easy to master, template patchworking is highly satisfying.
You need:
- A print-out of the template onto cartridge paper/tag board (similar to sketch paper)
- A selection of 6 different fabrics
- 2 needles, both sharp: one thicker for working with templates, one finer for stitching seams
- 2 reels of sewing cotton: one contrasting with your fabrics, one matching them
- Paper cutting scissors or craft knife, cutting mat and straight edge
- Fabric cutting scissors
- Stuffing (polyester fill, fabric scraps, cotton, wool, etc)
Instructions:
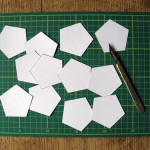
1. FIRST PRINT your template. You can enlarge it if you wish to make a bigger ball.
Then carefully cut out the 12 pentagons. This needs to be done as accurately as possible.
Use scissors or a craft knife and a cutting mat, whichever you feel happiest with.
2. SELECT SIX different fabrics – I recommend choosing six that have a colour theme but a variety of patterns – eg large, small, regular, pictorial.
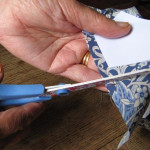
3. CAREFULLY CUT out your fabric by holding a template against the fabric and cutting around it, leaving a border of 5-8mm – this is your seam allowance.
You need to cut two of each fabric, making the required twelve in all.
4. NOW YOU’RE ready to cover your templates!
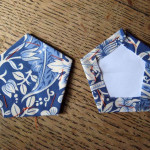
Place a template in the centre of the back of one of your cut fabrics and, using the thicker of your needles threaded with contrasting thread, start tacking the fabric to the paper.
Carefully turn the seam allowance over the edge of the paper and tack along each side of the pentagon, stitching through the paper.
At each corner you need to neatly fold the fabric and stitch through it and the paper to hold it securely.
It is important that these corners are as neat as possible. If not, you’ll run into lumpy problems later.
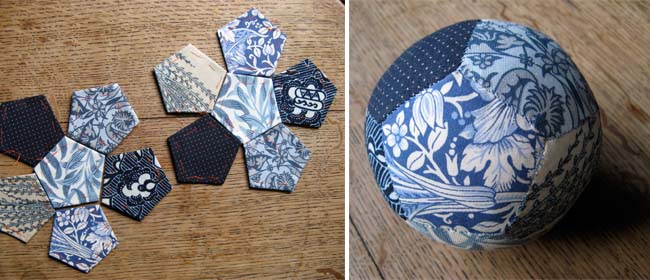
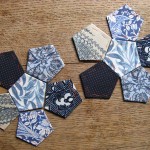
5. NEXT, LAY OUT your 12 covered pentagons so that the fabrics fall on the finished ball with no two the same touching. This is not as complicated as it sounds!
Start with two matching ones to form the centre of each ‘flower’.
Position the remaining five patterns around one of those centres.
For the second ‘flower’, place the pentagons in the reverse order around the central one.
6. THE NEXT step is to join all the pentagons together.
Take a central one and one of the ‘petals’. Align them so they match and hold them right sides together.
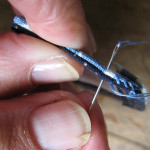
Make a couple of little backstitches to secure the thread and, using your matching sewing cotton and thinner needle, over-sew the two pieces together along the edge. I use a double thread for extra strength.
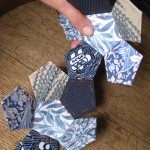
Once you have sewn your first seam, pick up the next pentagon and repeat the process until all five ‘petals’ are attached to the central pentagon.
To finish off a thread simply repeat the double backstitch process and trim off the excess thread.
Repeat the whole process for the second ‘flower’, ensuring you stitch in the correct order.
7. THIS IS a key moment – joining the two ‘flowers’ together. First stitch two ‘petals’ on one of the ‘flowers’ together (it doesn’t matter which two). Do not cut the thread.
Next, hold the second flower against the top of your new seam ensuring that the fabric matches that on the opposite side of the central pentagon. Stitch the two ‘flowers’ together along the new seam. Now, if you carefully fold the two panels together, you’ll see how the ball will take shape.
Stitch together the remaining seams, checking all the while that the ball shape is forming. Note, the right sides of templates should be facing inwards, inside the ball.
As you finish seams, double backstitch to finish the thread neatly and securely. REMEMBER, leave one seam open for turning the ball right sides out and stuffing!
8. ONCE YOU have surrounded a pentagon with five others, you can remove the template by simply cutting the tacking stitches.
This makes it easier to handle and stitch as more seams are completed.
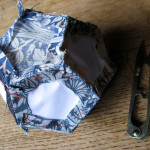
9. ONCE ALL the templates are removed, turn the ball right sides out by carefully feeding it through the seam you have left open.
Put your fingers inside and gently flatten out the corners.
10. STUFF! The key to successful stuffing is a little at a time. It’s tempting to push lots in in one go but, honestly, a little bit at a time is much easier to work with.
The ball will eat up you stuffing. The firmer you make it the more you’ll use.
At this stage you could add in catnip to drive your feline friend into a frenzy. Or you could add a bell – this needs to be in its own little fabric pouch so that the stuffing doesn’t clog it up and it still rings. This would make a lovely gift for a baby.
11. ONCE YOU are happy with the consistency of your ball, pin the opening together and, using tiny stitches, close and over-sew the seam.
Voila! One beautiful ball. You can make several in different sizes.
Click here to download your template
 My Favourites







Thank you so much for this tutorial! Although I would have liked to see more illustrations (I am a visual learner), your instructions did make sense to me. It is my first time to make a patchwork ball 🙂 and found your tutorial easy to follow.
Sandra
South Kilkenny
Rep of Ireland
I’m glad it turned out well, Sandra. 🙂
Hi ,
I have tried this today but my ball hasn’t taken on a ball shape, instead is it a 3D star shape, I have tried padding it out with stuffing as much as I can,
Any tips on what I might be doing wrong please?
thank you
Hi Jasmine
I’m sorry your design hasn’t worked out. Have you definitely used 12 shapes to put it together?